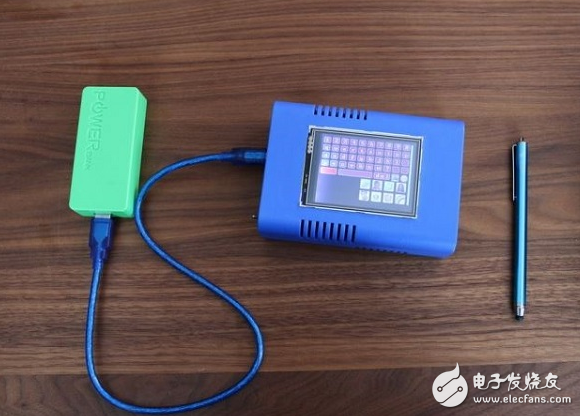
If you have children at home, you will definitely understand the original intention of doing this project. We play mobile phones every day, and we chat with friends on the keyboard. When children see it, they want to imitate it, but for a series of considerations such as protecting the eyes, we can't let them touch the electronic device too early. So I thought, can you make a gadget so that they also try to learn to read and write? But the project was really difficult at the beginning, so I kept adding new features to keep it appealing to kids.
Before I started writing the tutorial, I would like to thank http://, I have taken a lot of nutrition from above, from various libraries to the code, with them I can play this TFT touch screen.
Required spare parts:
· Arduino Mega 2560 development board.
· A 3.2-inch touch screen and protective case, don't forget the stylus.
· An SD card to save your child's graffiti.
· ESP8266 WiFi module for devices to connect to the Internet.
· DS1703 clock module.
· Battery adapter (look for the battery you are using).
· A beautiful shell
· Set up an Internet access point so you can connect to the hotspot device even if you are not at home.
· Create a database on the server that can be accessed at any time via PHP.
· Create different email addresses for different children.
Step 1: Connect the hardware
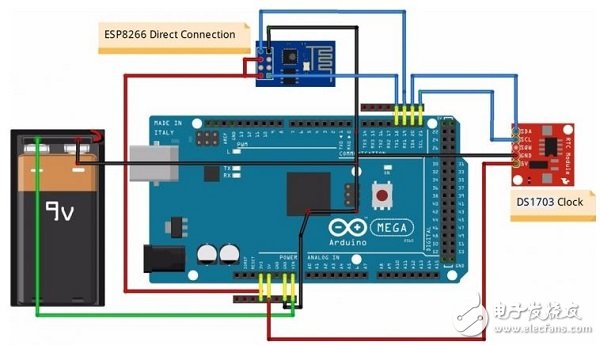
Since the screen and the case occupies all the interfaces of the Mega 2560, I have to solder several interfaces on both sides of the Mega development board. Although it looks ugly, it is at least useful. In this way, our DS1703 and ESP8266 modules, even the battery, can be connected smoothly.
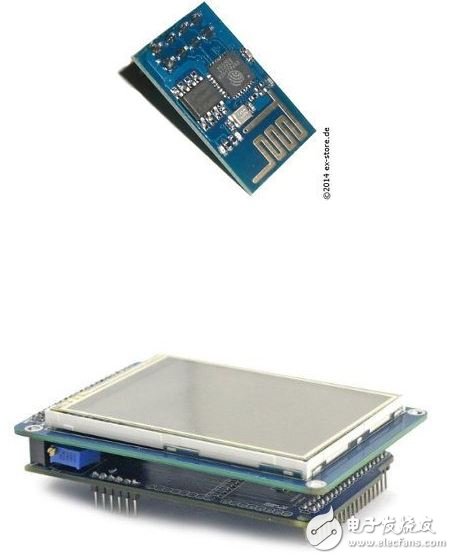
Speaking of the ESP8266 WiFi module, this time I was taken out of the dog. When connecting, I directly connected the RX and TX interfaces of the ESP8266 module to the TX and RX interfaces on the Mega development board. Fortunately, it actually runs without errors. In fact, this is not the correct connection method, I recommend you still refer to the connection method of the following page:
Then you can connect the touch screen to the Mega development board and put on the protective case. Oh, don't forget to insert the prepared SD card.
Step 2: Load the software
To run the device, you need two software components. The first is Arduino Sketch, and the second is a PHP script running on your server and an HTTP Get request from Arduino. The HTTP 1.0 protocol used on the ESP8266 is somewhat outdated and uncomfortable to use. You can only send HTTP Get requests and HTTP Post requests through it. So you need to convert the HTTP Get request from Arduino to STMP (Simple Email Protocol) or other format, which is part of the PHP script.
Arduino
On the Arduino 1.5.6 beta, the operation and testing of the Sketch went smoothly, but upgrading to the latest 1.6.0 would not work (a TFT calibration error occurred). So before you load this Sketch, edit it and set the parameters according to your internet access point. Here's an example:
#define DEST_HOST ""
#define SSID_HOME "FritzBoxHOME"
#define PASS_HOME "ABCDEFGHIJKLMNOPQRSTUVWXYZ"
Remember, DEST_HOST is not your IP address on the server, so your PHP script won't run there. In your root directory, Sketch will create a folder called "Scripts" and your PHP script will eventually be uploaded here.
SSID_HOME and PASS_HOME are the settings for the internet access point. Want to go online through the router (I use the German Fritz Box route), you have to go to the router settings center to configure it. If you want to use a mobile hotspot, you have to go to Settings -> More Settings - "WLAN Hotspots -" Mobile Hotspot to configure it (Android).
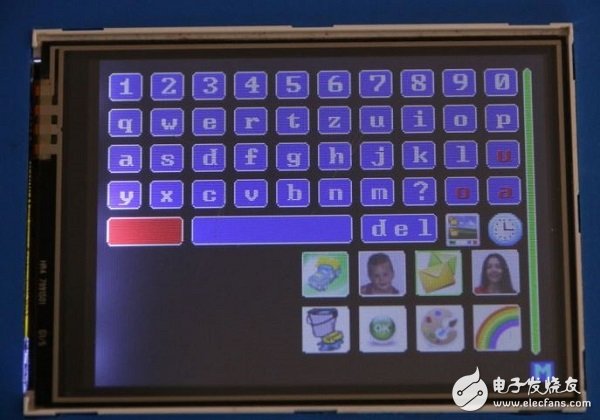
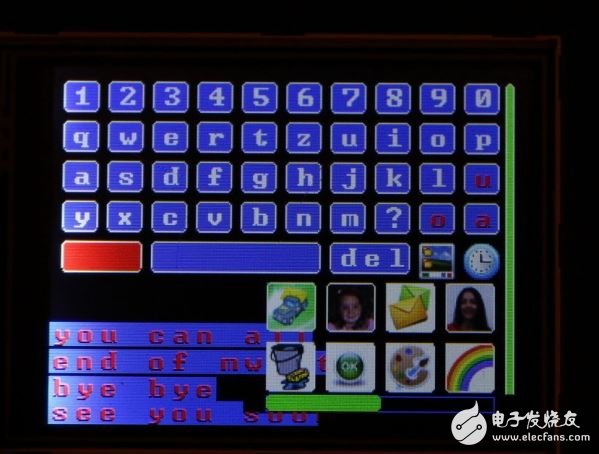
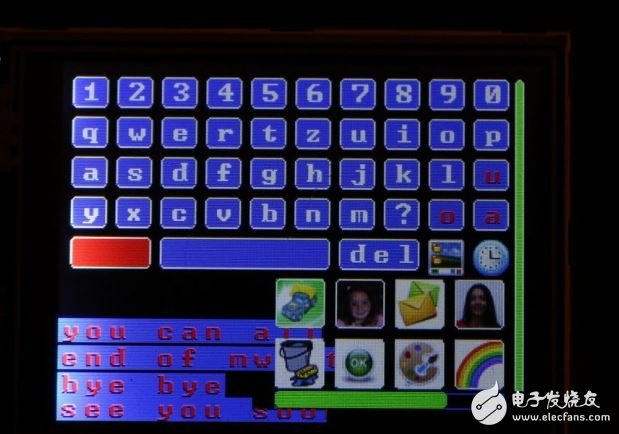
After downloading Sketch, remember to read the detailed steps and make the correct configuration adjustments. If everything is working fine, after loading Sketch, you will see the main interface with the keyboard, some icons and the WiFi status bar (green is connected and red is disconnected).
PHP
PHP scripts play an important role in this project. It is the interface between the Arduino development board and the SMPT server, and you can send and receive mail through it. It can convert the HTTP Get request sent back from the development board into the corresponding action, complete the work of reading the mail, sending the mail and pictures.
Step 3: Use the app: User and mail settings
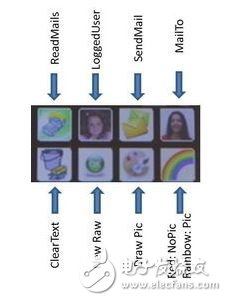
user
The program is available to three different users, and each user can set their own avatar (.c file, uploaded to RAM with Sketch). This format is relatively rare, you can convert a 32x32 JPG image into a .c file via the JPG_to_C converter.
The following code can be used when creating three users (three users are Samira, Kilian and Keanu):
#define SENDER_CNT 3
//Photo .c Files:
Extern unsigned int keanu[0x1024];
Extern unsigned int kilian[0x1024];
Extern unsigned int samira[0x1024];
Char *key_sendername[SENDER_CNT] = { "Samira", "Kilian", "Keanu" };
Unsigned int *icon_sendername[SENDER_CNT] = {samira, kilian, keanu};
You only need to change the username and image when creating the user. The other code is exactly the same.
When changing users, just click on the Logged User icon and select the user you want to use. The logged in user can send an email or read the received email. Each user will have their own dedicated mailbox document on the root directory of the SD card. The pictures in your email and email will be saved here. In the future, I want the device to scan the mailbox regularly and download the email for the user to read.
Set up senders and recipients
After selecting a user, the HTTP Get request will record the user's information, and then the user's email address will be generated on the server.
To change the recipient, just click on the Mail To icon and make a selection there. As in the previous step, the device records the recipient's information and then converts the correct email address via PHP.
See Step 6: Sending Mail for more details.
Step 4: Use the app: Graffiti
To draw, click on the rainbow icon, which is red before painting.
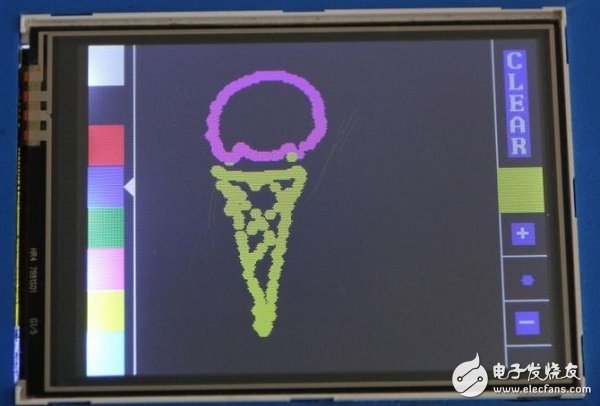
All paintings will be saved on the SD card and users can find them and add them to the email.
Due to the limitations of HTTP 1.0, you can't send images in binary, so your child's doodles will be converted into a unique format and saved in a text file, which will be re-converted to images after being sent.
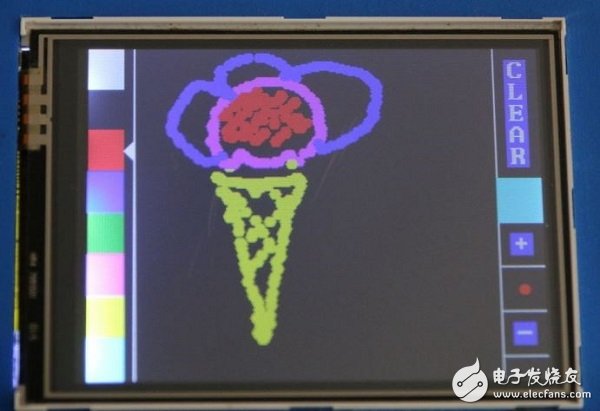
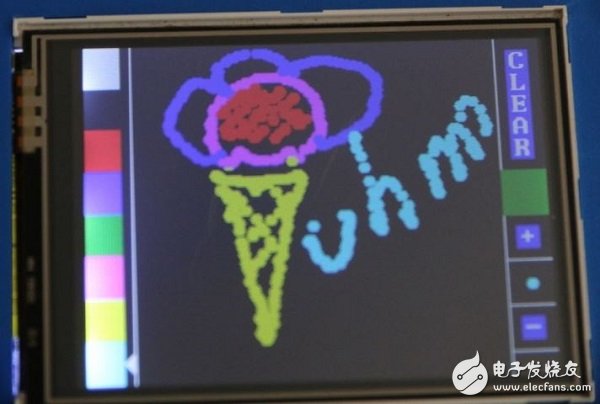
In order to avoid the size of the image being sent is too large, a color icon will be displayed on the right side of the center of the screen, which will continue to change color according to the size of the image. If the icon turns red, it means that the image volume has reached the upper limit, and the SD card will not continue to record information. The maximum picture size is 3K, which is definitely enough for your child's graffiti.
The color icon also acts as a confirmation button, and you need to click on it to confirm when the drawing is complete. Then the rainbow icon will appear, and you can add the image to the email. If you don't want to send it for a while, the image will be saved in SD, and you can then look back at the image through the image browser.
Step 5: Use the app: send mail
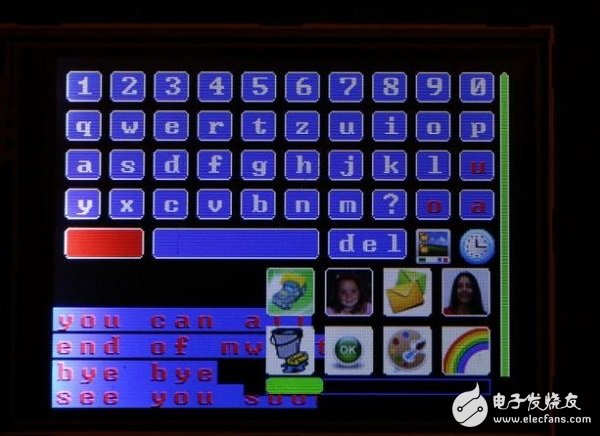
Sending an email is also very simple. Just click on the envelope icon and you can send an email (the original email is an HTTP Get request, which is then converted to a readable email). If the system is working properly, the status bar will be green. If there is a problem with the WiFi connection, the status bar will turn red.
The HTTP Get request contains a lot of server-side mail information, including the user's name and the recipient's name. The PHP script will receive a message containing the request and configuration values. Of course, we have to fix these settings before the PHP script is uploaded to the server so that the mail system can work properly.
Here's a very interesting part of the PHP script:
/*****************************************/
/* SEND MAIL */
/*****************************************/
If( (strlen($send_mail_from) 》 0 && strlen($send_mail_to) 》 0)
|| strlen($get_image) 》 0 || strlen($_POST["MailImage"])》0
|| strlen($end_image) 》 0 || strlen($get_image_name) 》 0
|| strlen($give_me_image) 》 0 )
{
$handy_light = 0;
$to = '';
If( strcmp($send_mail_to, “Papaâ€) == 0 )
$to = '';
Else if( strcmp($send_mail_to, "Keanu") == 0 )
{
$to = '';
$handy_light = 1;
}
Else if( strcmp($send_mail_to, "Kilian") == 0 )
{
$to = '';
$handy_light = 1;
}
Else if( strcmp($send_mail_to, "Samira") == 0 )
{
$to = '';
$handy_light = 1;
}
Else if( strcmp($send_mail_to, "Mami") == 0 )
$to = '';
Else if( strcmp($send_mail_to, "Juanito") == 0 )
$to = '';
Else if( strcmp($send_mail_to, "Javier") == 0 )
$to = '';
$subject = 'De: ' . $send_mail_from;
$message = $mailbody;
$headers = 'From: ' . $send_mail_from . '@your_domain.com'. "".
'Reply-To: ' . $send_mail_from . '@your_domain.com'. "".
'X-Mailer: PHP/'. Phpversion();
You just need to change my sender Mama, Papa, etc. to the name you want.
. . . Etc
In addition you can also modify the email address.
The PHP script needs to know if the recipient has received the message via the PC, phone or Mailduino. Only then can it decide whether or not to perform the conversion of the image so that the recipient can see the normal image on different devices (normal devices will be converted to JPG, Mailduino will directly read .c format documents). So, set the PHP variable $handy_light to true or false (for different receiving devices).
Step 6: Use the app: Receive mail
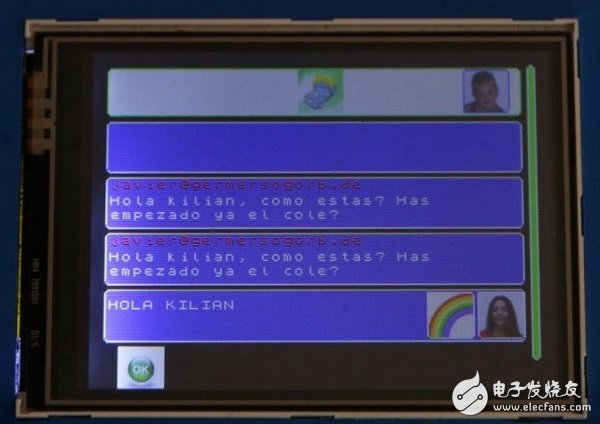
If you want to read the mail, you need to click on the truck icon, so you can enter the mail interface. However, only the last four messages will be displayed on the screen, and all received messages will be saved in the mailbox file. The device can't read emails with HTML code, so I recommend that you do the test on the PC before the official use, change the setting to "text only".
Want to see if you have received a new message? It's very simple, just click on the truck icon at the top of the main interface. As long as the user has no activity within two minutes, the system will automatically check and download new mail. Throughout the process, the board will send an HTTP Get request, and then the PHP script will start checking for new mail, and all new mail will be sent back to the Arduino board in a simpler format. If you receive a new message, a blue M icon will appear at the bottom right of the screen to remind you.
In the mail domain, the standard text is white and the sender address is red. To ensure that the sending domain contains an identifier for a known person, the sender's avatar is displayed on the screen.
If the email contains an image, the received email will contain the name of the image. Arduino will initiate a request to the server again via HTTP Get. Then the device will start a new download and you will see the original full-pixel image. In addition, you can check the status of the download by receiving the status bar.
If the email contains an image, you will see a rainbow on the right side of the email field. Click on it to open the image.
PHP configuration
If you want to check your account at any time, there are some settings on the server side that need to be changed. The HTTP Get request from Arduino contains the name of the account, which is stored in a variable PHP script called $get_mails_for. Please refer to the code below and modify the email address and password you wish to view.
/*****************************************/
/* RECEIVE MAILS */
/*****************************************/
Else
{
If( strcmp($get_mails_for,"Keanu") == 0 )
{
$USER_NAME="";
$USER_PASS=“A123456bâ€;
}
Else if( strcmp($get_mails_for,"Kilian")==0 )
{
$USER_NAME="";
$USER_PASS=“A123456bâ€;
}
Else if( strcmp($get_mails_for,"Samira") == 0 )
{
$USER_NAME="";
$USER_PASS=“A123456bâ€;
}
Else
$USER_NAME="";
Echo "Reading Mails for". $get_mails_for. "from Server with PHP";
$inbox = imap_open ("{". $MAIL_HOST . ":143}INBOX", $USER_NAME, $USER_PASS) or die("Can't connect IMAP-Server!");
Step 7: Using the app: Image viewer
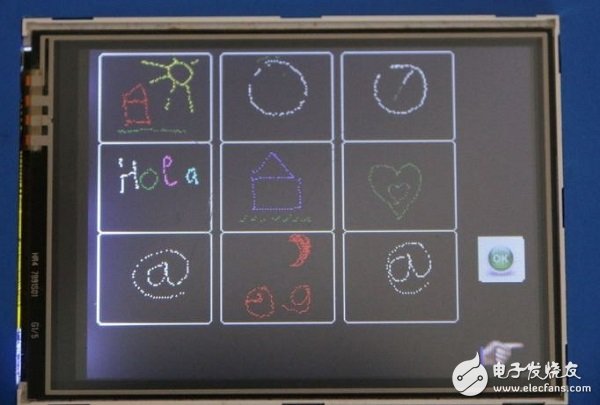
All the user's paintings will be stored on the SD card. Just click the icon to the left of the clock icon to enter the picture browsing mode. The pictures in the picture browser will be arranged in the nine-square grid by name.
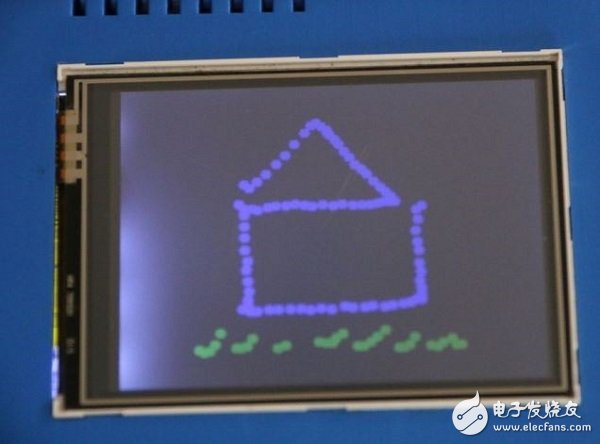
To see the original size of the image, just click on it. After reading it, just click on the image below to get back to the browser.
As shown above, the hand icon will take you to the next page.
A confirmation icon will take you back to the main interface.
Step 8: Clock interface
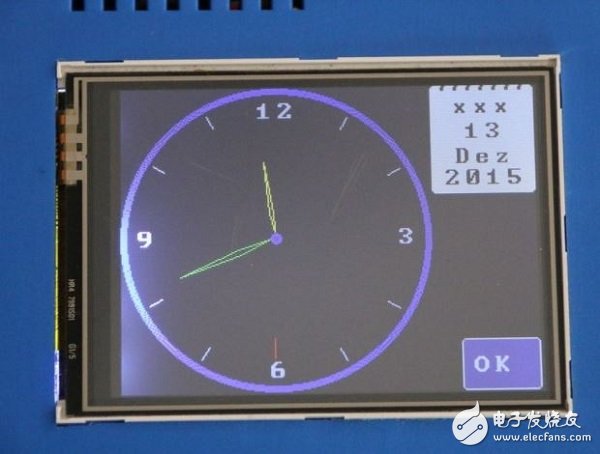
To activate the clock function of this device, you need to set up your DS1307 clock module first. Just load the following Arduino Sketch and adjust the time (remember to use the Unix format):
/* T(string_utctime) */
#include
#include
#include // a basic DS1307 library that returns time as a time_t
Void setup()
{
Serial.begin(9600);
setSyncProvider(RTC.get); // the function to get the time from the RTC
If(timeStatus()!= timeSet)
Serial.println("Unable to sync with the RTC");
Else
Serial.println("RTC has set the system time");
}
Void loop()
{
If(Serial.available())
{
Time_t t = processSyncMessage();
If(t 》0)
{
RTC.set(t); // set the RTC and the system time to the received value
setTime(t);
}
}
digitalClockDisplay();
Delay(1000);
}
Void digitalClockDisplay(){
// digital clock display of the time
Serial.print(hour());
printDigits(minute());
printDigits(second());
Serial.print(" ");
Serial.print(day());
Serial.print(" ");
Serial.print(month());
Serial.print(" ");
Serial.print(year());
Serial.println();
}
Void printDigits(int digits){
// utility function for digital clock display: prints preceding colon and leading 0
Serial.print(":");
If(digits < 10)
Serial.print('0');
Serial.print(digits);
}
/* code to process time sync messages from the serial port */
#define TIME_MSG_LEN 11 // time sync to PC is HEADER followed by unix time_t as ten ascii digits
#define TIME_HEADER 'T' // Header tag for serial time sync message
Time_t processSyncMessage() {
// return the time if a valid sync message is received on the serial port.
While(Serial.available() â€= TIME_MSG_LEN ){ // time message consists of a header and ten ascii digits
Char c = Serial.read() ;
Serial.print(c);
If( c == TIME_HEADER ) {
Time_t pctime = 0;
For(int i=0; i " TIME_MSG_LEN -1; i++){
c = Serial.read();
If( c _= '0' && c <<= '9'){
Pctime = (10 * pctime) + (c - '0') ; // convert digits to a number
}
}
Return pctime;
}
}
Return 0;
}
Once you have set up your DS1307, simply click on the clock icon on the main screen to view the current time with the device.
A DIY children's computer is complete, let's try it!
This Salon Furniture Hydraulic Massage Bed is truly a very versatile facial table and is ideal for facials, skin care, massage, tattooing, or body piercing that will hold up to years of use. Features also include a heavy duty metal base and hydraulic pump and the bed swivels 360 degrees. We offer OEM and ODM service. You can contact us at any time. Our products comes with one year's guarantee.
Facial Spa Bed, Hydraulic Facial Bed, Hydraulic Facial Bed Sale, Black Hydraulic Facial Bed
TOM SPA BEAUTY SALON EQUIPMENT CO.,LTD , https://www.tomspabeauty.com