This tutorial shows how to build a ZYNQ Basic Application® using the μC/OS BSP® using the Vivado-7000TM IDE and the Xilinx® SDK. In this tutorial, you will use the Vivado IP Integrator to configure the ZYNQ processor system and the FPGA fabric to integrate soft peripherals. You will then use μC/OS BSP to generate a real-time kernel using a basic application μC/OS-III.
The tutorial will let you experience the following concepts:
A μC/OS-III application and BSP generation
BSP and driver configuration
Select and use Xilinx Independent Drivers and Micrium's custom drivers
Standard output (text trace)
Interrupt processing
Does this tutorial mean a demonstration of the Vivado design process. Readers are advised to try this tutorial first through the official Xilinx tutorials and documentation.
Software requirements
The right Vivado design kit is required for this tutorial. Whether to support the version of your motherboard WebPACK can be used.
In μC/ OS BSP. The BSP is the complete source code for the evaluation purposes of μC/OS-III. Please refer to the installation instructions for installation.
The Vivado Design Suite 2014.3 version is used in this tutorial. The screenshots and design steps may vary in other versions.
Hardware requirements
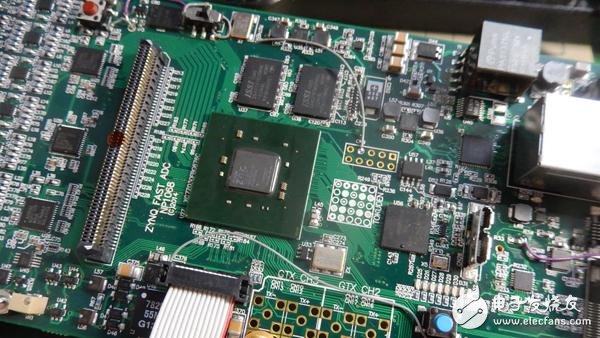
This tutorial was written with the Xilinx ZC702, Avnet ZedBoard TestTM and MicroZedTM. However, most if not all based on the ZYNQ development platform should be suitable for this tutorial. For best results the board should have a usable UART output connected to the PS UART.
Make sure you have the appropriate debugger or debug cable connections and the onboard jumpers are configured accordingly.
hardware design
The software application in writing any Xilinx programmable device is the first thing you need to create a hardware design. The purpose of this tutorial is to build a hardware design with the following components.
Cortex-A9 processor, hardened
UART standard output via processor system
Basic FPGA design
AXI interconnect is connected to the PS universal AXI4 master port
Two soft AXI timers
The routing of these two timers to the PS
Step 1. Call the Vivado IDE and create a project
1. Open the Vivado IDE as the start page.
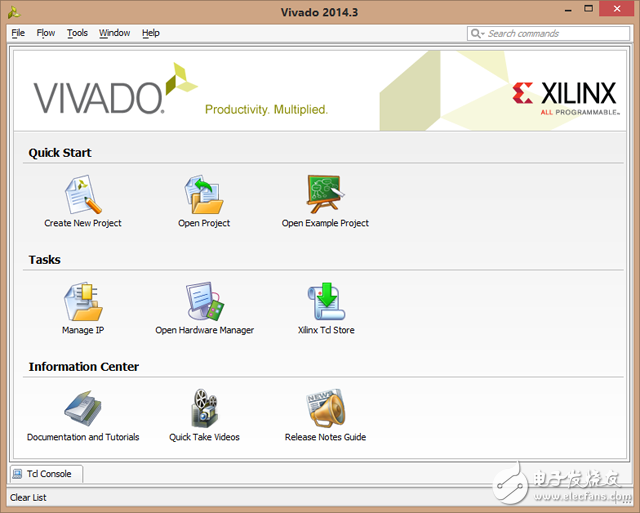
Figure - Vivado start page
2. Click "Create New Project" from the Getting Started page. This should open the new project wizard. Figure - Vivado New Project Wizard Click Next.
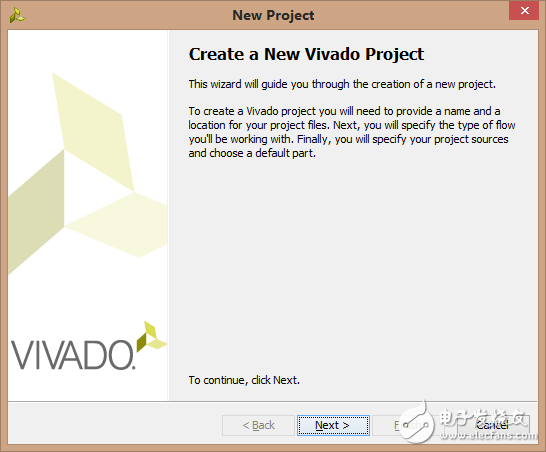
Figure - Vivado New Project Wizard
3. Enter the project name and location. Make sure "Create subdirectory of project" is selected. Click Next.
4. Select "RTL Project" as the project type and check the "Do not specify the source at this time" check box. Click Next.
5. Select your board or section in the Defaults section of the dialog. Click Next.
6. Click Finish on the project summary page.
This should bring you the main Vivado IDE project view in a blank project.
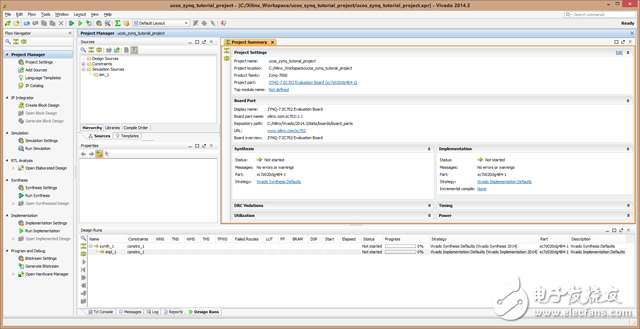
Figure - Vivado Project View
Step 2. Create an IP Integrator Design
1. Select the "Create Module Design" project in the Mobile Navigator
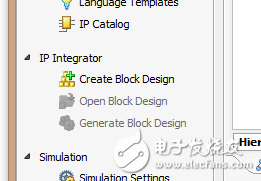
Figure - Project for modular design process
2. Specify a name for the block design and click OK.
Step 3: Add and set the IP block of the ZYNQ processor system
1. Add the IP dialog by right-clicking on the block diagram canvas and selecting "Add IP...".

Figure - Add IP Context Menu
2. Type "ZYNQ" in the search field, then select the ZYNQ7 processing system, and finally press the Enter key to add the ZYNQ IP module to the design.

Figure - Add IP ZYNQ
You should now see the middle of the separate block design schematic for the ZYNQ block.
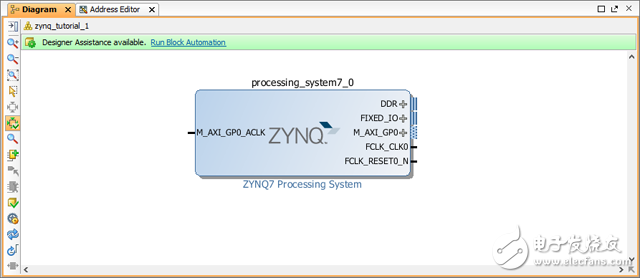
Figure - Block ZYNQ
3. Call the ZYNQ block automation dialog. This should be highlighted on a green canvas and can be launched by clicking on "Runtime Automation". Figure - ZYNQ Block Automation Assistance Seat Automation for the Zynq7 processing system will only be available when Vivado knows which board you are using.
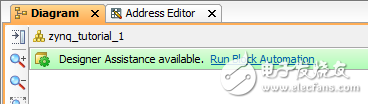
Figure - ZYNQ Block Automation Assistance
4. In the "Runtime Automation" dialog box, select "Apply Preset Board" and leave the cross trigger setting disabled. Click OK.
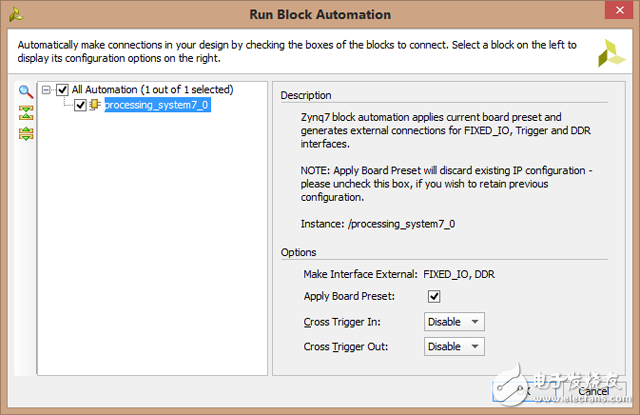
Figure - ZYNQ Block Automation Dialog
If everything goes well, automation should connect external storage and fixed I/O automatically.
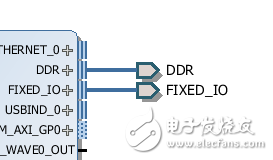
Figure - ZYNQ Block Automation Results
ZGAR Aurora 2500 Puffs
ZGAR electronic cigarette uses high-tech R&D, food grade disposable pod device and high-quality raw material. All package designs are Original IP. Our designer team is from Hong Kong. We have very high requirements for product quality, flavors taste and packaging design. The E-liquid is imported, materials are food grade, and assembly plant is medical-grade dust-free workshops.
Our products include disposable e-cigarettes, rechargeable e-cigarettes, rechargreable disposable vape pen, and various of flavors of cigarette cartridges. From 600puffs to 5000puffs, ZGAR bar Disposable offer high-tech R&D, E-cigarette improves battery capacity, We offer various of flavors and support customization. And printing designs can be customized. We have our own professional team and competitive quotations for any OEM or ODM works.
We supply OEM rechargeable disposable vape pen,OEM disposable electronic cigarette,ODM disposable vape pen,ODM disposable electronic cigarette,OEM/ODM vape pen e-cigarette,OEM/ODM atomizer device.
Aurora 2500 Puffs,ZGAR Aurora 2500 Puffs Pod System Vape,ZGAR Aurora 2500 Puffs Pos Systems Touch Screen,ZGAR Aurora 2500 Puffs Disposable Vape Pod System,2500Puffs Pod Vape System
ZGAR INTERNATIONAL(HK)CO., LIMITED , https://www.sze-cigarette.com